
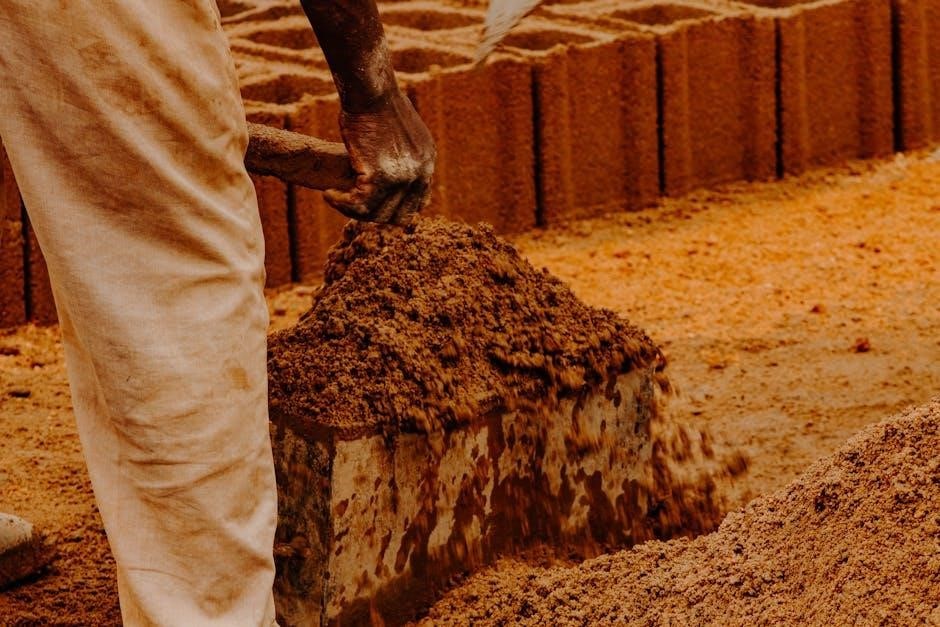
Manual soil compaction involves using basic tools and techniques to densify soil layers, enhancing stability and strength for construction or landscaping projects.
Importance of Soil Compaction
Soil compaction is essential for improving stability, strength, and durability in construction and landscaping projects. It prevents settling, ensures even surfaces, and enhances load-bearing capacity. Proper compaction reduces soil density, promoting healthy root growth and water penetration. It also minimizes erosion risks and creates a solid foundation for structures. Effective compaction ensures long-term integrity, making it a critical step in various applications, from road construction to garden preparation.
Overview of Manual Compaction Methods
Manual soil compaction employs techniques like tamping, kneading, and vibration to densify soil layers. Tools such as hand tampers, rammers, and plate compactors are commonly used. These methods rely on repetitive force application to reduce air pockets and increase soil density. They are ideal for small-scale projects, offering precision and cost-effectiveness. Manual compaction is often combined with water addition to enhance efficiency, ensuring a stable and even surface for various applications.
Understanding Soil Types and Their Compaction Needs
Soil types, such as clay, sand, silt, and loam, have unique compaction requirements. Clay soils are cohesive but prone to over-compaction, while sandy soils lack cohesion and require vibration. Silt and loam balance these traits, needing moderate effort. Understanding these differences is crucial for effective manual compaction.
Clay Soils and Their Compaction Characteristics
Clay soils are highly cohesive and plastic, making them challenging to compact manually. They exhibit high compressibility but can become brittle if over-dried. Proper water content is critical, as excessive moisture leads to instability, while insufficient moisture prevents optimal bonding. Manual compaction tools like hand tampers or rammers are effective for small-scale projects. Compacting clay in thin layers and allowing it to settle between passes helps achieve uniform density. Over-compaction should be avoided to prevent cracking and reduced permeability.
Sandy Soils and Their Compaction Requirements
Sandy soils, composed of large, non-cohesive particles, require careful manual compaction to achieve stability. Their porous nature allows water to drain quickly, making moisture control less critical. Optimal compaction occurs when the soil is slightly damp, typically at 5-10% moisture content. Hand tools like tampers or rammers are effective for small-scale projects. Compact in thin layers, using repetitive tamping motions to ensure particles settle tightly. Over-compaction is less likely with sandy soils, but even distribution is key for uniform density and strength.
Silt and Loam Soils: Specific Compaction Techniques
Silt and loam soils, with their medium to fine particles, respond well to manual compaction when moist. Ideal moisture levels range from 10-15%, as this reduces air pockets and enhances cohesion. Hand tampers or plate compactors are effective tools for these soils. Compact in thin layers, applying steady, even pressure to ensure uniform density. Overworking should be avoided, as it can disrupt the soil’s structure. Proper technique ensures stability and prevents settling issues in silt and loam soils during manual compaction.

Preparation Steps for Manual Soil Compaction
Clear debris, level the ground, and moisten the soil to optimal moisture content for effective compaction. Proper preparation ensures uniform density and prevents settling issues.
Clearing the Site of Debris
Before compacting, remove all debris such as rocks, twigs, and weeds to ensure uniform soil density. Clearing prevents uneven surfaces and interference with compaction tools. Use a rake or shovel to gather debris, then level the ground. For stubborn roots or large objects, dig them out carefully. Organic matter like leaves should also be removed to avoid decomposition issues. Once cleared, use a sieve or fine rake to eliminate small particles, ensuring the soil is smooth and ready for compaction. A clean surface is essential for effective results.
Leveling the Ground
Leveling ensures even compaction and prevents structural issues. Use a shovel or rake to distribute soil evenly, filling low spots and removing high areas. A spirit level or string lines can guide accuracy. Once leveled, lightly tamp the surface with a hand tool to set the soil. Proper leveling promotes uniform density and prevents settling. It’s crucial for achieving a stable base, especially for construction or landscaping projects. Always check and re-level as needed before proceeding with compaction.
Moistening the Soil for Optimal Compaction
Moistening the soil optimizes compaction by improving density and stability. Aim for a damp consistency, avoiding excessive water that could weaken the soil structure. For most soils, apply water until it’s moist but not soggy. Use a watering can or hose with a fine spray to evenly distribute moisture. Allow the water to absorb fully before compacting. Proper moisture levels enhance the effectiveness of manual compaction techniques, ensuring a firm and even surface. This step is crucial for achieving long-lasting results effectively.

Tools and Equipment for Manual Compaction
Manual soil compaction requires essential tools like hand tampers, plate compactors, rammers, and vibratory plates. These tools help achieve desired density and surface stability effectively.
Hand Tampers: Design and Usage
Hand tampers are essential tools for manual soil compaction, featuring a flat, heavy plate attached to a long handle. They are designed for applying even pressure to small areas. The plate’s weight and size vary, but they typically range from 6 to 12 inches in width. Users stamp or press the tamper into the soil, ensuring firm contact. Regularly moistening the soil enhances compaction efficiency. Hand tampers are ideal for tight spaces and precise control, making them a practical choice for small-scale projects.
Plate Compactors: Manual vs. Mechanical
Manual plate compactors are portable tools designed for small-scale projects, relying on physical effort to compress soil. They are ideal for precise control in confined spaces. Mechanical plate compactors, however, are engine-powered, offering greater force and efficiency for large-scale tasks. While manual versions provide affordability and ease of use, mechanical ones excel in speed and capacity, making them suitable for construction sites. Choosing between them depends on project size and required compression depth.
Other Tools: Rammers and Vibratory Plates
Manual soil compaction also utilizes rammers and vibratory plates for efficient results. Rammers are handheld tools with flat or rounded ends, ideal for compacting small, targeted areas. Vibratory plates, typically mechanical, offer superior density but can be adapted for manual use in smaller scales. These tools enhance compaction depth and uniformity, making them essential for various projects. Proper use ensures even distribution and prevents over-compaction, ensuring long-lasting stability in the soil structure.

Manual Compaction Methods and Techniques
Manual soil compaction involves techniques like tamping, kneading, and applying static or vibratory pressure to densify soil effectively for small-scale projects and tight spaces.
Tamping: The Basic Manual Compaction Method
Tamping is the simplest manual compaction technique, involving repetitive striking or pressing of the soil surface using tools like hand tampers or heavy plates. This method works best for small-scale projects and shallow depths. The tool is typically lifted and dropped or pressed down with force, ensuring even distribution of pressure. Moist soil responds better to tamping, as it reduces air pockets and improves density. Consistent, overlapping passes are essential to achieve uniform compaction without leaving gaps.
Kneading: A Detailed Approach
Kneading involves manually manipulating the soil to compact it, similar to kneading dough. This method is effective for small, targeted areas and works well with clay or loam soils. By breaking down clods and aligning particles, kneading enhances soil density and stability. It’s best performed in manageable sections, using a pressing and folding motion. Regular moisture checks ensure optimal results. This technique is ideal for precise compaction needs, such as pathways or garden beds, where mechanical tools are impractical. Consistency is key to achieving uniform density and preventing settling.
Vibration and Static Load Techniques
Vibration and static load techniques involve applying repeated pressure or oscillating forces to the soil. These methods enhance compaction by breaking down air pockets and aligning soil particles. Hand tools or plates can be used to generate vibrations, while static loads apply consistent weight. This approach is effective for deeper layers and improves soil stability. It’s often combined with other methods for optimal results, ensuring a dense and even surface. Regular checks ensure the desired compaction level is achieved without over-consolidating the soil.

Step-by-Step Process of Manual Compaction
Manual compaction involves preparing the soil, applying pressure using tools like tampers or plates, and repeating the process in layers to achieve maximum density and stability.
Layering the Soil
Layering involves dividing the soil into manageable thicknesses, typically 4-6 inches, to ensure even compaction. Start by spreading the first layer evenly across the site. Use a hand tamper or plate compactor to apply consistent pressure, working in overlapping passes. Moistening the soil slightly enhances compaction effectiveness. Repeat the process for each subsequent layer, ensuring proper alignment with the previous one. This method prevents settling and ensures a stable, uniform base. Compacting in layers is essential for achieving optimal density and strength in manual soil compaction.
Applying Pressure
Applying pressure is crucial for achieving effective manual soil compaction. Use a hand tamper or plate compactor to press down firmly on the soil surface. Apply consistent, even force to avoid uneven density. For larger areas, use foot pressure or stomp repeatedly to compress the soil deeply. Ensure the tool or footwear contacts the soil squarely to maximize compaction efficiency. Proper pressure application ensures the soil stabilizes and becomes resistant to settling or shifting under subsequent loads or environmental changes.
Repeating the Process for Maximum Density
Repeat the compaction process multiple times to achieve maximum soil density; After the initial layer is tamped, apply another pass with the same tool, ensuring even pressure distribution. For deeper compaction, repeat the process on overlapping sections. Use a hand tamper or plate compactor to reinforce the surface. Typically, 3-5 passes are sufficient for optimal results. Check density by inserting a tool; resistance indicates effective compaction. Consistent repetition ensures long-term stability and prevents future settling.

Testing and Verification of Compaction
After compacting, verify soil density by inserting tools or observing settlement. Check surface evenness and perform probe tests to ensure uniform compaction depth and stability.
Soil Probe Test: Measuring Compaction Depth
The soil probe test is a simple method to measure compaction depth. Insert a metal probe vertically into the ground and note resistance. Hard, dense soil resists deeper, indicating effective compaction. If the probe penetrates easily, the soil may need further compaction. This test helps verify uniformity and ensures the desired density is achieved across the compacted area, providing a reliable way to assess manual compaction effectiveness without advanced equipment.
Visual Inspection of the Surface
After manual compaction, visually inspect the surface for uniformity and density. Look for an even, smooth appearance without cracks or soft spots. Properly compacted soil should feel firm underfoot and resist indentation. Check for standing water, as it may indicate poorly compacted areas. Ensure no debris remains and the surface aligns with desired leveling. Any irregularities suggest the need for additional tamping or adjustments; This step ensures the surface meets compaction standards before final use.
Checking for Settlement or Shifting
After compaction, inspect the soil for signs of settlement or shifting. Check for unevenness or cracks, which may indicate inadequate compaction. Use a spirit level or straightedge to ensure the surface is even. Walk on the compacted area to detect soft spots or movement. If settlement occurs, apply additional compaction efforts. Monitor the site over time, especially after rainfall, as moisture can reveal stability issues. Addressing these problems ensures long-term structural integrity and prevents future complications.

Safety Precautions and Best Practices
Wearing sturdy footwear and gloves protects against injuries. Proper lifting techniques prevent strain. Ensure the workspace is clear of tripping hazards. Work in well-ventilated areas to avoid inhaling dust.
Protective Gear: Footwear and Gloves
Wearing appropriate protective gear is essential for manual soil compaction. Sturdy footwear with thick soles protects feet from heavy tools and sharp objects. Steel-toe boots are recommended for added safety. Gloves prevent blisters and provide grip, reducing the risk of dropping tools. Choose durable, puncture-resistant gloves for handling rough materials. Properly fitting gear ensures comfort and effectiveness, allowing you to work safely for extended periods. Always inspect gear for wear and tear before use to maintain protection.
Avoiding Overexertion
Avoiding overexertion is crucial during manual soil compaction to prevent fatigue and injuries. Take regular breaks to rest muscles and maintain energy levels. Lift tools correctly by bending at the knees and using leg strength, not just your back. Use tools with ergonomic handles to reduce strain. Pace yourself and avoid working excessively long periods without rest. Stay hydrated and adjust your work rate according to your physical condition. Proper posture and technique can significantly reduce the risk of overexertion.
Working in a Well-Ventilated Area
Working in a well-ventilated area is essential for safety during manual soil compaction. Inhaling dust or fumes from disturbed soil can be harmful. Open windows or work outdoors to ensure fresh airflow. Avoid breathing in airborne particles by maintaining a safe distance from the compaction zone. Use fans to circulate air if working indoors. Proper ventilation prevents respiratory discomfort and ensures a healthier working environment. Always prioritize airflow to safeguard your well-being during the process.
Tips for Effective Manual Compaction
Use water to improve soil density, work in small sections for even compaction, and maintain tools for efficiency. These methods ensure optimal results.
Using Water to Enhance Compaction
Water plays a crucial role in manual soil compaction by reducing particle friction, allowing for tighter packing. Apply water sparingly to achieve optimal moisture levels, typically 10-15% of the soil’s weight. Excessive water can hinder compaction by creating a muddy consistency. Moistening the soil before starting and between compaction layers ensures even density. Proper hydration enhances the effectiveness of manual tools like tampers and rammers, leading to a more stable and compact surface. Avoid overwatering to prevent weakening the soil structure.
Working in Small, Manageable Sections
Dividing the soil into small, manageable sections ensures even compaction and reduces fatigue. Start by marking the area into grids or strips, focusing on one section at a time. This approach prevents oversight and allows for consistent pressure application. Completing one area before moving to the next helps maintain organization and efficiency. Small sections also make it easier to achieve uniform density, avoiding soft spots or uneven surfaces that can develop in larger, less controlled areas.
Maintaining Tool Efficiency
Regular maintenance of compaction tools is essential for optimal performance. Keep hand tampers and plates clean and free from soil buildup, as debris can reduce effectiveness. Sharpen edges periodically to ensure proper contact with the soil; Lubricate moving parts to prevent rust and friction. Store tools in a dry, protected area to maintain their condition. Proper care extends tool lifespan and ensures consistent compaction results, making the manual process more efficient and reliable over time.

Troubleshooting Common Issues
Address soft spots by re-tamping. Fix uneven surfaces with additional layers. Loosen over-compacted soil for better drainage. Regular checks ensure even compaction and prevent structural issues.
Addressing Soft Spots
Soft spots occur due to insufficient compaction or uneven moisture. Identify these areas by checking for spongy surfaces. Re-tamp using a hand tamper or plate compactor, ensuring even pressure. Add water if soil is dry, as moisture aids compaction. Avoid overwatering, as it can weaken soil structure. For persistent soft spots, apply a thin layer of compacted aggregate before re-tamping. Regularly inspect and address soft spots to maintain soil stability and prevent future settling issues.
Fixing Uneven Surfaces
Identify uneven areas by inspecting the surface for high or low spots. Use a shovel or rake to redistribute soil, ensuring an even layer. Re-level the ground using a spirit level or straightedge. Compact the corrected area with a hand tamper or plate compactor, applying consistent pressure. Check the surface again and repeat if necessary. For larger unevenness, remove excess soil, re-lay in small sections, and compact thoroughly. This ensures a stable, even base for further work or construction.
Dealing with Over-Compacted Soil
Over-compacted soil can hinder water infiltration and root growth. To address this, loosen the surface using a garden fork or tiller. Apply a thin layer of organic matter like compost to improve soil structure. Water gently to allow the soil to settle naturally. Avoid further compaction until the soil has recovered. If the area is severely over-compacted, consider aerating or replanting after loosening the soil. Monitor the soil’s condition to ensure proper drainage and aeration for healthy plant growth.
Comparison with Mechanical Compaction Methods
Manual compaction is cost-effective and suitable for small-scale projects, while mechanical methods offer greater efficiency for large areas. Each has its unique advantages and applications.
Advantages of Manual Compaction
Manual compaction is cost-effective, ideal for small-scale projects, and requires no specialized machinery. It suits areas inaccessible to heavy equipment, ensuring precise control and even distribution. Environmentally friendly, it avoids noise and emissions, making it suitable for residential zones. It’s also a hands-on approach, promoting physical activity and accessibility without needing advanced skills. While labor-intensive, it’s efficient for localized tasks where machinery isn’t practical. This method balances economy, accessibility, and environmental benefits effectively.
Limitations and Challenges
Manual compaction is time-consuming and labor-intensive, making it impractical for large-scale projects. It requires significant physical effort and can be tiring over extended periods. Achieving uniform density is challenging, especially in deep layers. The process is slower compared to mechanical methods, limiting its efficiency for extensive areas. Additionally, manual compaction may not reach the same level of density as machine-based techniques, potentially affecting structural integrity in critical applications. These factors make it less suitable for industrial or commercial-scale projects.
When to Choose Manual Over Mechanical
Manual compaction is ideal for small-scale projects, such as garden paths or minor construction, where mechanical equipment is impractical. It is cost-effective for limited areas and offers precise control for delicate surfaces. Manual methods are also preferred in noise-restricted or environmentally sensitive zones, avoiding emissions and vibrations. For small budgets or when mechanical tools are unavailable, manual compaction provides a practical, low-cost solution. It ensures quality results in situations requiring careful, hands-on attention.
Manual soil compaction is a straightforward yet effective method for achieving stable ground. By following proper techniques and using appropriate tools, anyone can ensure durable results.
Manual soil compaction requires understanding soil types, proper preparation, and the right tools. Techniques like tamping and kneading ensure density. Safety gear and hydration are essential. Start with small sections, moisten soil for better results, and avoid overexertion. Regular testing ensures effectiveness. Maintain tools and address issues promptly. Best practices lead to a stable and durable surface, making manual compaction a reliable method for various projects.
Encouragement for Proper Technique
Mastering manual soil compaction takes patience and consistency. By following proper techniques, you ensure a stable foundation for your project. Always moisten soil, use appropriate tools, and work in manageable sections. Pay attention to safety and maintain your tools for efficiency. With practice, you’ll achieve professional-grade results, avoiding costly repairs and ensuring long-term durability. Stay committed to best practices for a job well done and a surface that withstands time and use.